Change links and buttons on your website
It’s easy to change links or buttons on your website depending on segmentation. This is a great way to do conversion-boosting things like changing sitewide navigation or prominent calls-to-action based on who someone is.
Step 1: Select the segment you want to a link for
Every personalization in RightMessage starts by taking into account the segment you want to target.
Select the segment you want to personalize for in the control bar.

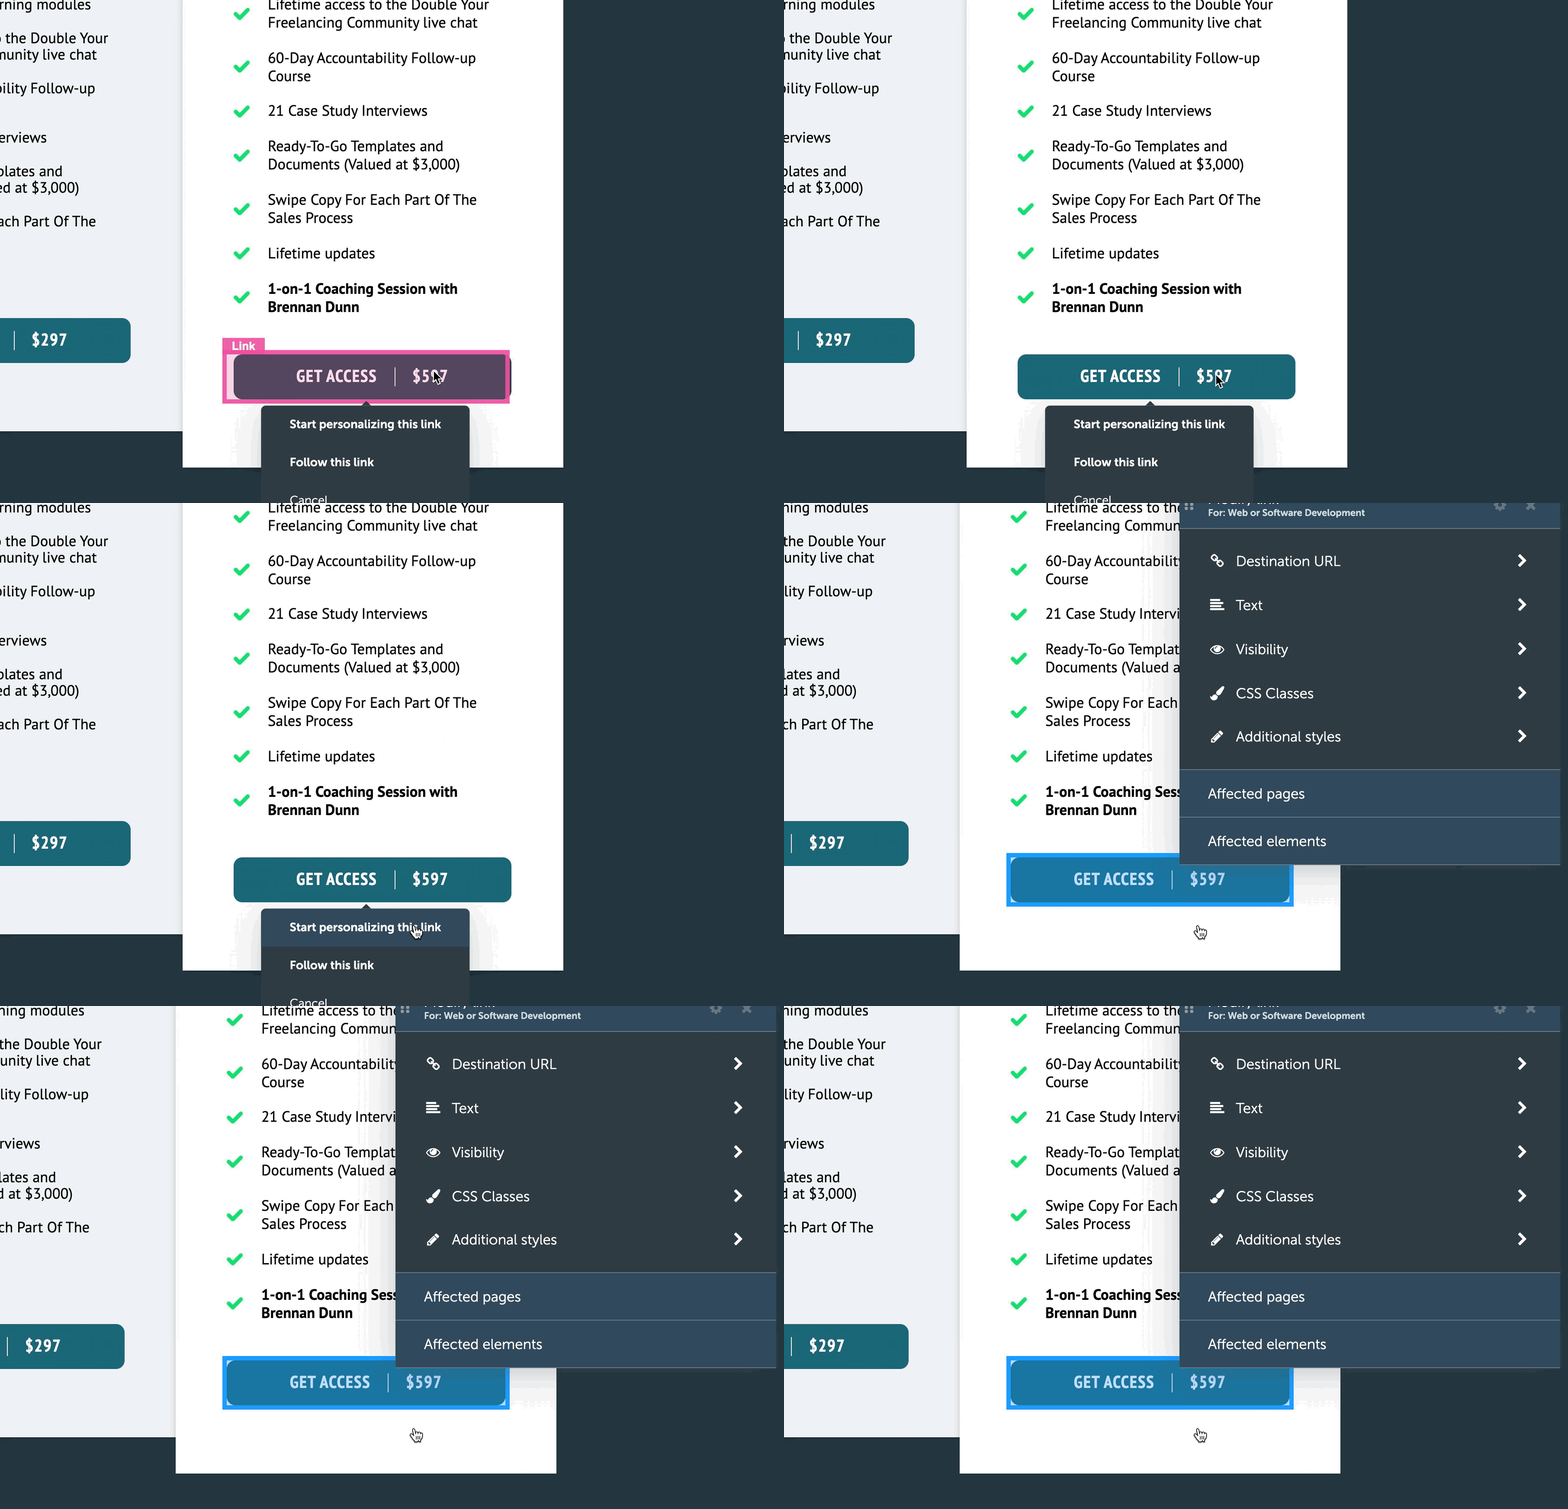
Step 2: Click on the link you want to modify
Using our visual editor, simply click the link or button you want to change.
Click Start personalizing this link
A floating window will appear.

Step 3: Make your changes
Expand the “Destination URL” or “Text” areas in the floating window.
Enter in the content that you’d like to replace your link/button text or destination URL with.

Step 4: Don’t forget to publish!
Finally, once you’re ready to go live with these changes click the “Publish to website” button at the top right of your screen.
Any changes you make in RightMessage – including changes to personalizations – won’t actually go live on your website until you click “Publish to your website”.
For more information on how this all works, check out our section on publishing.
Tracking conversion goals
By default, new RightMessage personalization campaigns will attempt to personalize your website for all visitors. Attach a campaign goal (or goals) to a campaign, and it will automatically be A/B tested.
- About Us
- Contact Sales
- Contact Customer Support
- © RightMessage Inc. 2024
- Privacy Policy
- Terms of Service
