Setting up offers for your CTA Funnels
Offers are where people take action. It’s where they fill out a lead form, opt-in to your email list, or are sent to a specific page on your website.
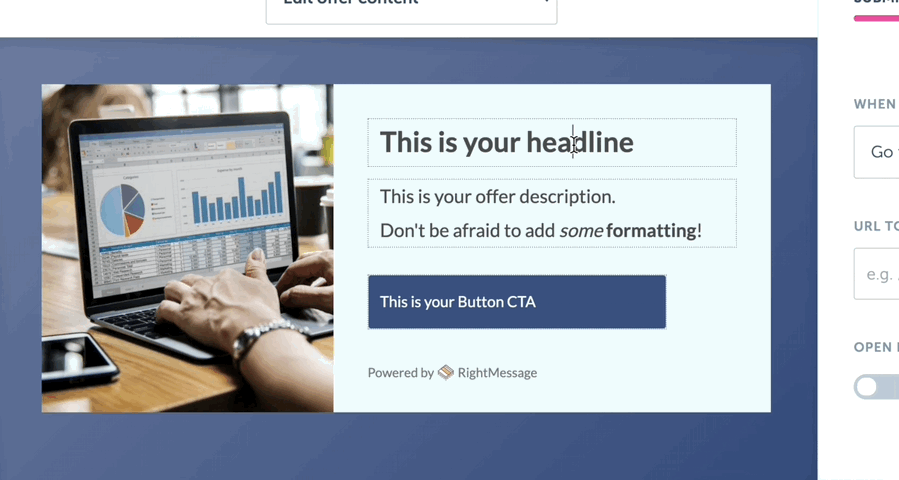
The elements of an offer
An offer is made up of the following properties:
- Headline
- Description
- Form fields (if the offer is meant to generate leads or show a form)
- Image
- CTA button text
You can edit each of these fields by clicking and editing on them directly in the offer preview.

Not every widget type shows every available field. For example, an offer shown in a bar doesn’t show the image or description – there’s just not enough visual real estate for that to happen. Likewise, toaster popups don’t show images.
Personalizing offer text
Text stored in the headline, description, or CTA button can also be personalized based on segmentation.
To personalize text, highlight the text you want to change and then click Personalize.
Select the Segment Group you’d like to pivot around (i.e. “Industry”) and then we’ll display a personalization matrix: on the left is the segment, and on the right is the text you’d like us to replace your highlighted text with if the visitor is matched into this segment.

Leaving a mapping field blank will show the default value, which is the text you highlighted when creating this personalization.
URL vs Lead Form offers
There are two types of RightMessage offers: URL and lead forms.
A URL Offer will present the visitor with a promotion for something (most likely some other page on your website, like a product.) You’ll set the URL that people should be redirected to when they click your CTA button, and whether or not we should open the page in a new browser tab.
A lead form offer does exactly what you expect: captures a lead. You can add custom fields or dropdowns for existing Segment Groups / questions, and this data will be synced up to your ESP/CRM on submission.
With a lead form, we’ll also intelligently pre-fill any data we already know the answer to – or that you already have stored in your ESP/CRM (assuming the visitor seeing the form is already an identified contact.)

Depending on the ESP/CRM you’ve integrated with, different options will appear in the dropdown below When submit button is clicked. This might be submitting a form in your ESP/CRM, tagging, adding to a list, and so on.
If RightMessage creates a new contact record in your ESP/CRM when the form is submitted, any segmentation data that you’ve mapped will be synced up to the new contact.
Don’t see lead capture options under When submit button is clicked? Then you haven’t yet integrated your RightMessage account with your ESP/CRM. Head over to our Integrations section to get started.
Configuring a lead form
By default, all lead forms need an email address.
Beyond that, you can add any number of text inputs that will map to a field in your ESP/CRM. This is a must if you want to capture data like the visitor’s name, company, and so on.
Click the pink + icon above the email field to add a new form field.
Add a text field
Here you can create an input that maps to a field in your ESP/CRM, along with specify a label for the field (i.e. “Enter your first name” for first name) and whether it’s required to submit the form.

Add a multiple choice dropdown
You can also add a dropdown that maps to an existing Segment Group.
This is useful for things like selecting a US state, where it wouldn’t make sense to present someone with a question that has 50 different answers. It’s effectively an another way of asking a question.
If someone’s already segmented into your Segment Group, the dropdown will be pre-selected by default. However, the visitor can change their segmentation.

Setting up a lead form redirect
Our offer editor includes a powerful redirection tool that lets you create conditional redirects based on the same routing options you have when editing a visitor journey in the CTA Funnel editor.
Click Set up redirect in the “Submission options” panel (at the right side of the offer editor.)
You can either keep things super simple, and add a Redirect to page node that just brings people to /confirm-your-email… or you can set up sophisticated redirects to various pages based on how someone’s segmented.

Renaming or disabling an offer
To rename or disable an offer, click the “Details” tab in the offer editor.
Any changes you make in RightMessage – including changes to offer content – won’t actually go live on your website until you click “Publish to your website”.
For more information on how this all works, check out our section on publishing.
Managing multiple CTA Funnels
Things can get muddy if you have multiple CTA Funnels set up in your account, each with widgets that are competing for the same screen real estate. In this guide, we’ll cover a few best-practices to help you keep everything in check.
- About Us
- Contact Sales
- Contact Customer Support
- © RightMessage Inc. 2024
- Privacy Policy
- Terms of Service