Managing multiple CTA Funnels
Things can get muddy if you have multiple CTA Funnels set up in your account, each with widgets that are competing for the same screen real estate. In this guide, we’ll cover a few best-practices to help you keep everything in check.
Only running funnels on certain pages
CTA Funnels run on all pages, all the time.
However, there are a few ways to ensure that your funnels are only showing on certain pages (or when certain segmentation is met.)
Option #1: Set up whitelists/blacklists for your widgets
Edit each of your widgets and define whitelisted or blacklisted pages for your widgets. More details on setting these inclusions and exclusions are available here.

This will need to be done for each widget, however. Depending on how many you have added to your funnel, this might get a bit tedious.
Option #2: Create a yes/no rule
To short-circuit a funnel you can add a yes/no decision at the top of your funnel, and have the “yes” path exit the funnel.
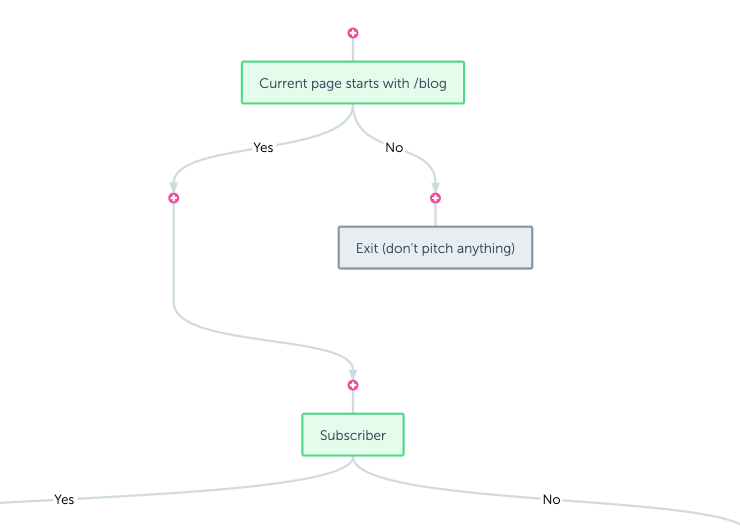
Let’s say you want your funnel to only run on your blog.
Add a yes/no decision node at the top that targets if the current page starts with /blog. If no, exit the funnel. Otherwise, run your funnel.

This can also be used to target other segmentation or behavioral data beyond just the current page.
Option #3: Define a “Ignored pages” segment
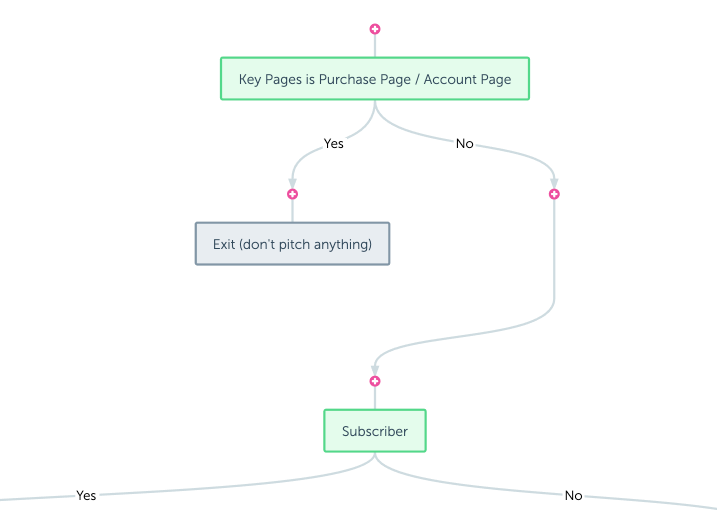
If you find yourself really wanting a giant list of pages that shouldn’t have RightMessage CTA Funnels run on them, the easiest way to do this is to create a segment that has auto-segmentation that matches all the pages you don’t want funnels run on (i.e. your cart, checkout page, account summaries, courseware, etc.)

Once you’ve created this segment, reference it with a yes/no decision at the top of each of your funnels.

CTA Funnels from first-to-last
The first widget to claim a particular part of the screen, like a sticky bar shown at the top of your website, gets it. Any other CTA Funnels that also try to have a top sticky bar show when RightMessage has already added one won’t have their widget shown.
Keep this in mind as you develop your CTA Funnel strategy – and, remember, for many of our customers a single CTA Funnel is more than enough (at least to start with!)
