Adding RightMessage to your Webflow website
RightMessage helps you personalize elements of your Webflow website to convert the website traffic on your site into leads, sales, customers, and clients.
To begin using RightMessage you must install a small JavaScript tracking snippet into your website’s pages. This activates RightMessage.
Follow the instructions below to connect RightMessage to your Webflow Website
Copy your RightMessage tracking code
Log into your RightMessage account and copy the RightMessage tracking snippet:

Click the Copy To Clipboard button to copy the code provided.
Add the RightMessage tracking code to your Webflow project settings
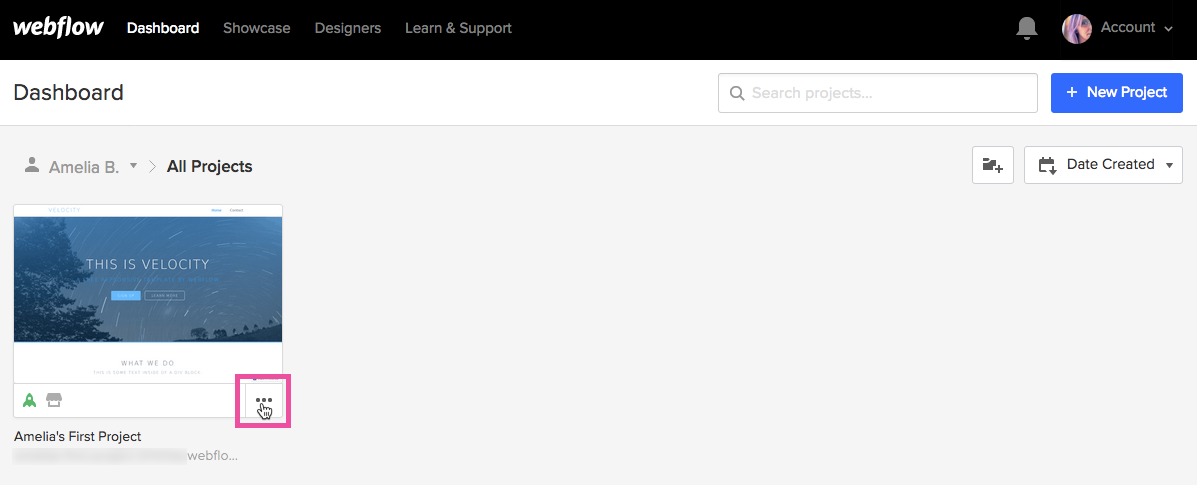
Log into your Webflow Admin area and click on the ... tab for the project you are adding integrating with RightMessage.

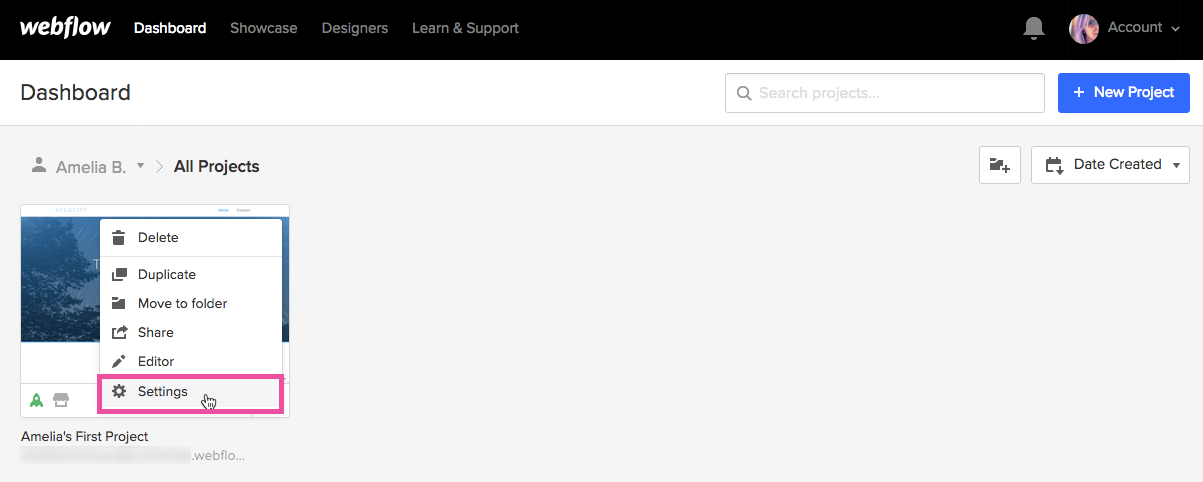
Click on the Settings option.

Click on the Custom Code tab.
Paste the RightMessage tracking script into the box under the Head Code.
Click the green Save Changes button to save the code to your Webflow project.

Click Custom Code tab in the project settings
Tracking script will go into the Head Code section
Paste the RightMessage tracking code into the box provided
Click to save the changes.
And you are done!
Common Set Up Issues
RightMessage has a built-in tracking script checker that will attempt to verify that the script is included correctly on your website. Sometimes that checker shows an error – but it’s almost always never an issue. Here’s what you need to know.
- About Us
- Contact Sales
- Contact Customer Support
- © RightMessage Inc. 2024
- Privacy Policy
- Terms of Service
